


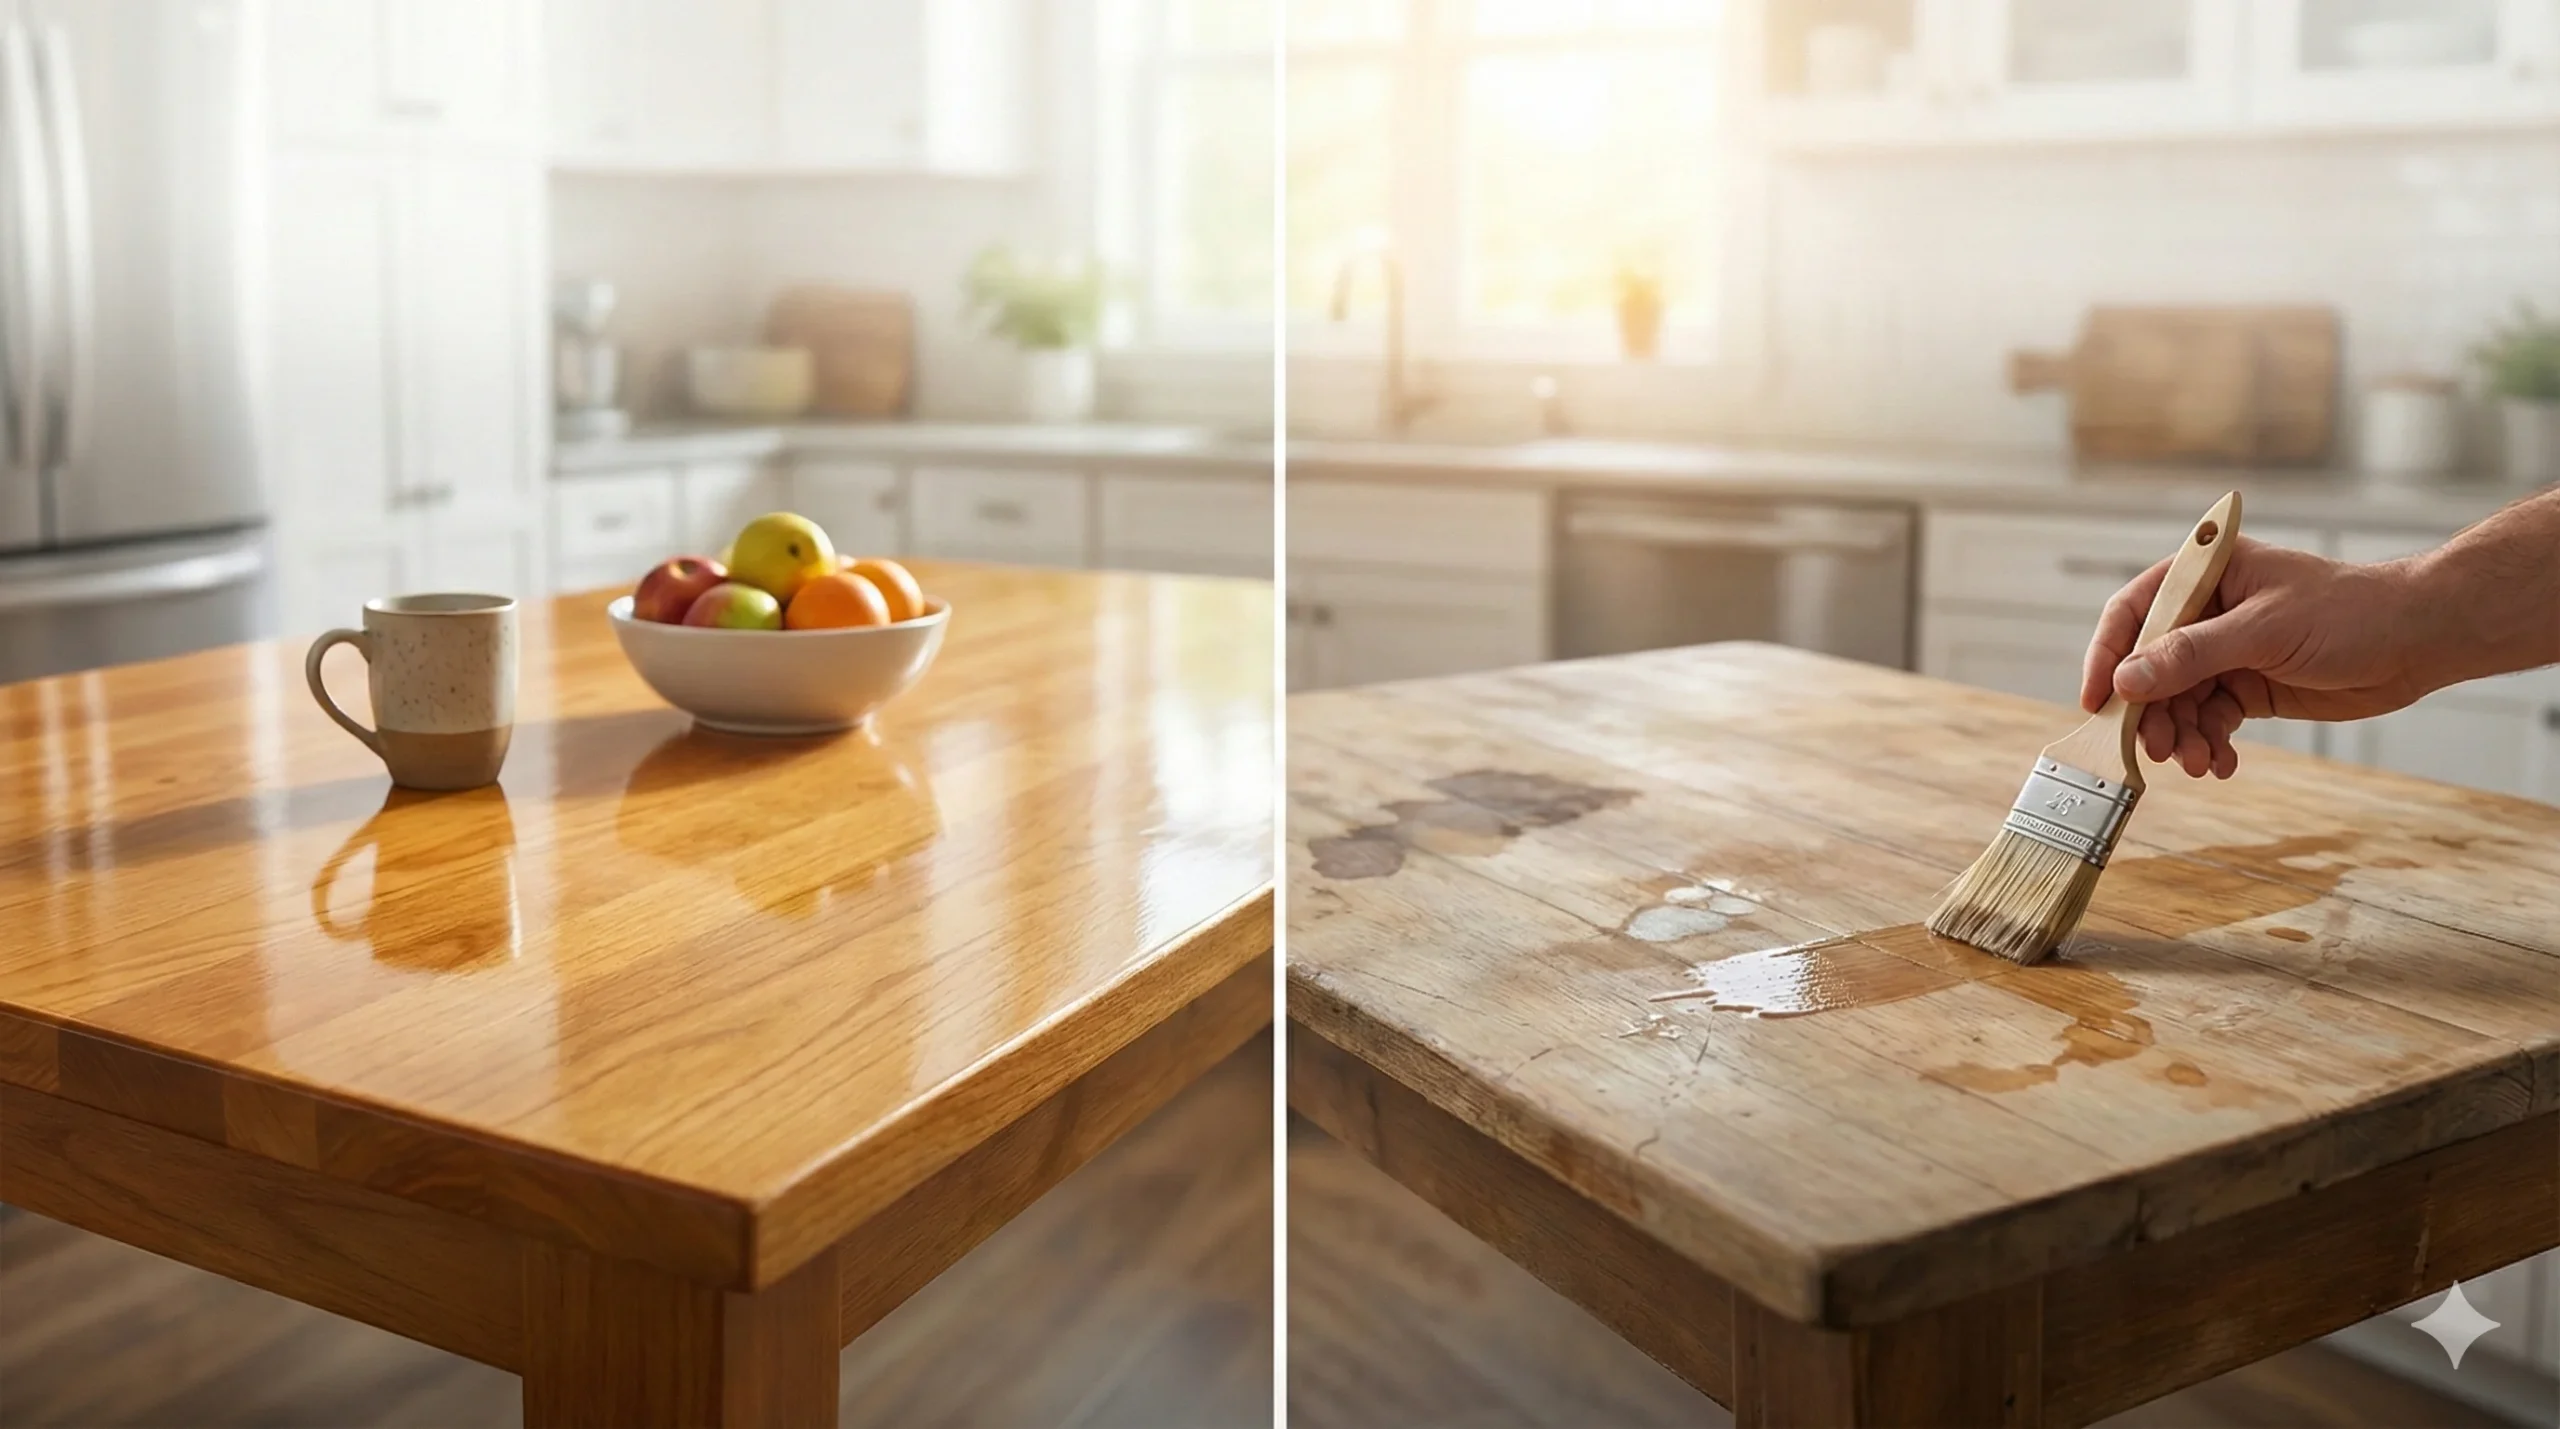
The kitchen table is the workhorse of the home. It is where hot coffee mugs are set down, spaghetti sauce is spilled, and homework is done with sharp pencils. Unlike a decorative side table, a kitchen table needs armor.
If you are refinishing or building a table, choosing the right kitchen table poly (polyurethane) is the single most important decision you will make. Pick the wrong one, and you’ll deal with peeling, white heat rings, or scratches within months. Pick the right one, and your table will survive family life for decades.
This guide covers everything from the chemistry of oil vs. water-based finishes to a step-by-step application protocol for a flawless, factory-like finish.
Part 1: Oil-Based vs. Water-Based Polyurethane
The first decision is chemical composition. Both protect wood, but they look and behave very differently.
1. Oil-Based Polyurethane
For decades, this was the gold standard. It is made with alkyd resins and solvents (usually mineral spirits).
- The Look: It has a warm, amber hue. When applied to dark woods like Walnut or stained Oak, it enhances the grain and adds depth. However, on light woods like Maple or Birch, it will turn them slightly yellow/orange.
- Durability: It is naturally thicker and softer (in a good way). It moves with the wood and resists heat and solvents exceptionally well.
- Drying Time: Slow. It takes 6–10 hours to dry to the touch and 24 hours between coats.
- Odor: High VOCs (Volatile Organic Compounds). You need excellent ventilation and a respirator.
2. Water-Based Polyurethane (Polycrylic)
Modern water-based finishes have advanced significantly. They use acrylic and urethane resins suspended in water.
- The Look: It dries crystal clear. It will not yellow over time. This makes it the only choice for “white-washed” tables, light Maple, or Ash if you want to keep the natural Scandinavian look.
- Durability: High-quality “High Performance” water-based polys are now almost as durable as oil-based, though they are harder and more brittle, meaning they scratch slightly easier but resist dents well.
- Drying Time: Fast. It dries in 1–2 hours. You can apply 3 coats in a single day.
- Odor: Very low odor. Safe to use indoors with a window open.
The Verdict for Kitchen Tables:
If you want a warm, vintage look and maximum heat resistance, go with Oil-Based. If you want a natural, light wood look and need to finish the project in one day, go with Water-Based.
Part 2: Choosing Your Sheen (Matte, Satin, or Gloss?)
The sheen isn’t just about looks; it affects how dirty your table appears.
- Gloss: The shiniest finish. It reflects the most light.
- Pro: Very durable.
- Con: Shows every fingerprint, dust mote, and scratch. Not recommended for kitchen tables.
- Semi-Gloss: A traditional shine.
- Pro: Easy to clean.
- Con: Can still look a bit “plastic” on rustic tables.
- Satin: The most popular choice.
- Pro: Hides scratches well and resembles natural hand-rubbed wax but with the protection of poly.
- Con: Requires thorough stirring to mix the flattening agents.
- Matte / Flat: The modern trend.
- Pro: Looks like raw wood; hides imperfections perfectly.
- Con: Can sometimes look “cloudy” if applied too thickly.
Recommendation: For a high-traffic kitchen table, Satin is the best balance of aesthetics and maintainability.
Part 3: Is Polyurethane Food Safe?
This is the most common question. Yes, but there is a catch.
According to FDA regulations, almost all clear wood finishes (including polyurethane) are food safe once they are fully cured.
- Dry vs. Cured: A table might feel “dry” in 24 hours, but it is not “cured.” Curing is the chemical process where the solvents evaporate and the resins harden completely.
- The Timeline:
- Water-based cure time: ~21 days.
- Oil-based cure time: ~30 days.
Safety Rule: You can use the table for light work after 3 days, but do not place food directly on the surface (like kneading dough) until the full 30-day cure time has passed.
Part 4: Step-by-Step Application Guide
This process assumes you have already stripped or sanded the table down to raw wood.
Phase 1: Preparation (The Most Critical Step)
Polyurethane magnifies surface flaws; it doesn’t hide them.
- Sand progressively: Start with 80-grit if the wood is rough, move to 120-grit, and finish with 220-grit. Do not skip steps.
- Raise the Grain (Water-Based Only): Water causes wood fibers to swell and stand up (fuzzy feeling). If using water-based poly, wipe the table with a damp cloth to “raise the grain,” let it dry, then lightly sand with 220-grit to knock the fibers down before applying the finish.
- Clean: Vacuum the dust. Then, use a Tack Cloth (a sticky cheesecloth) to pick up microscopic dust.
- Tip: If using water-based poly, do not use a tack cloth containing wax/silicone; use a microfiber cloth dampened with water or denatured alcohol instead.
Phase 2: Application
Tools Needed: A high-quality synthetic bristle brush (for water-based) or natural bristle brush (for oil-based). Do not use cheap chip brushes—the bristles will fall out into your finish.
- Stir, Don’t Shake: Never shake a can of poly. Shaking introduces air bubbles that will harden into the surface. Stir gently with a wooden stick.
- The First Coat: Apply a thin, even coat going with the grain. Don’t overwork it. Brush it on and leave it alone.
- Note: The first coat will look rough as it soaks into the thirsty wood. This is normal.
- Dry and Sand: Let it dry (2 hours for water, 24 for oil). Once dry, run your hand over it. It will feel bumpy (dust nibs). Hand-sand lightly with 320-grit or 400-grit sandpaper. You aren’t trying to remove the finish, just smooth out the bumps.
- Clean Again: Wipe away the white dust from sanding.
Phase 3: Building Layers
For a kitchen table, you need protection.
- Minimum Coats: 3 coats.
- Recommended Coats: 4–5 coats for the tabletop.
Repeat the “Apply -> Dry -> Sand -> Clean” process for every coat.
Phase 4: The Final Coat
For the very final coat, you want perfection.
- Ensure the room is dust-free (don’t sweep the floor right before painting).
- Apply the poly slightly thicker than previous coats to allow it to “self-level.”
- Do not sand the final coat.
Part 5: Troubleshooting Common Problems
1. Bubbles in the finish
- Cause: Shaking the can, using a cheap foam brush, or over-brushing (going back and forth too much).
- Fix: If wet, tip it off lightly with the brush. If dry, you must sand it down and recoat.
2. Brush Marks
- Cause: Applying when it’s too hot (dries too fast) or not putting enough product on the brush.
- Fix: Thin your polyurethane slightly. You can add 10% mineral spirits to oil-based poly or 10% water to water-based poly to help it flow out smoother.
3. “Fish Eyes” (Craters)
- Cause: Contamination on the wood, usually silicone from old furniture polish (like Pledge).
- Fix: This is hard to fix. You may need to sand down to bare wood and seal it with Shellac before applying poly.
Part 6: Maintenance and Care
Once your kitchen table is finished and cured:
- Cleaning: Use mild soap and water. Avoid ammonia-based cleaners (like Windex) as they can cloud the finish over time.
- Heat: Poly is tough, but a hot pot straight off the stove can melt or mark it. Always use trivets.
- Repair: If you get a deep scratch years later, the beauty of poly is that you can scuff-sand the table and apply a fresh topcoat without stripping the whole thing.
Summary Checklist
- Decide: Oil (Amber/Durable) or Water (Clear/Fast).
- Prep: Sand to 220 grit.
- Apply: 4 coats for table tops.
- Sand: 320 grit between coats.
- Wait: 30 days before heavy use.