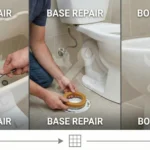


The rhythmic drip, drip, drip of a bathtub faucet leaking is more than just a nuisance that keeps you awake at night. It is a constant drain on your wallet. A faucet leaking just one drop per second wastes over 3,000 gallons of water per year.
The good news is that you don’t always need an expensive plumber to make it stop. Whether you have an old-school two-handle setup or a modern single-handle mixer, the cause is usually a simple worn-out part costing less than $10. This guide will teach you how to fix a leaking bathtub faucet yourself, covering everything from identifying the valve type to replacing the tricky cartridges found in popular brands like Delta and Moen.
Preparation: Safety First
Before you pick up a screwdriver, you must prepare the workspace. Rushing into this repair is the fastest way to turn a small drip into a flooded bathroom.
1. Turn Off the Water This is non-negotiable. You cannot repair a pressurized valve. Most bathtubs do not have isolation valves under the sink like a vanity does; the shut-off is often behind an access panel in the wall or, more likely, requires shutting off the entire home’s supply.
- Action Step: Locate your main water valve. If you aren’t sure where it is (often in the basement, garage, or near the street), read our guide on how to turn off water to your house to ensure you cut the supply safely and verify the flow has stopped before you start dismantling the faucet.
2. Protect the Drain There are tiny screws and washers inside your faucet. If one falls down the drain, your simple repair becomes a nightmare.
- Tip: Plug the tub drain or lay a thick towel over it to catch any falling parts.
Identify Your Faucet Type
To know how to fix a leaking faucet in the bathtub, you must first identify what is going on behind the wall. The repair method depends entirely on the valve mechanism.
- Two-Handle Faucets (Compression Valves): If you have separate “Hot” and “Cold” knobs, you likely have a compression faucet. These stop water by pressing a rubber washer down onto a metal seat. When the rubber wears out, the water sneaks through.
- Single-Handle Faucets (Cartridge/Ball Valves): If you have one handle that rotates to mix temperature, you likely have a cartridge, ball, or ceramic disc valve. These don’t use washers; they use a pre-assembled plastic cylinder (cartridge) that must be replaced as a whole unit.
If you are unsure which system you are working with, checking our breakdown of what are the different shower valve types can help you buy the correct replacement parts before you start taking things apart.
How to Fix a Two-Handle Faucet (Compression Type)
If you are dealing with a shower tap leaking from a two-handle system, the culprit is almost always a worn rubber washer.
Step 1: Remove the Handle Pry off the decorative cap (usually labeled “H” or “C”) with a flathead screwdriver to reveal the handle screw. Remove the screw and pull the handle straight off.
Step 2: Remove the Valve Stem You will see a hexagonal nut holding the valve stem in place. Use a shower valve socket wrench (a deep socket) to unscrew the stem and pull it out.
Step 3: Replace the Washer At the bottom of the stem, you will see a black rubber washer held on by a screw.
- Unscrew it and replace it with an exact match from a hardware store “faucet repair kit.”
- Pro Tip: Also replace the O-ring around the middle of the stem to prevent leaks from the handle itself.
How to Fix a Single-Handle Faucet (Cartridge Type)
Single-handle repairs are actually easier because there are fewer loose parts, but the parts are more expensive. This section specifically addresses how to fix a delta bathtub faucet leak, as their design is unique.
Step 1: Access the Cartridge Loosen the set screw on the underside of the handle (you usually need an Allen wrench/hex key) and slide the handle off. Remove the trim plate (escutcheon) by unscrewing the faceplate screws.
Step 2: Remove the Retaining Clip You will see a brass or plastic U-shaped clip holding the cartridge in place. Pull this clip straight up with pliers. Warning: Do not drop this clip inside the wall cavity!
Step 3: Swap the Cartridge Pull the plastic cartridge straight out. If it is stuck, use a cartridge puller tool.
- For Delta Faucets: Delta faucets use a “ball” assembly or a specific cartridge style. Crucially, behind the cartridge are small rubber seats and springs. You must replace these seats and springs (included in the repair kit) along with the cartridge, as they are often the true source of the leak.
Step 4: Reassemble Grease the new cartridge O-rings with plumber’s grease (silicone), slide it in, re-insert the clip, and reattach the handle.
Troubleshooting: What If It Still Leaks?
If you replaced the washer on a two-handle faucet and the drip persists, the problem is likely the valve seat.
- The Issue: The metal “seat” that the rubber washer presses against can get pitted or rough over time. A rough seat will shred a new washer in days.
- The Fix: Buy a “seat wrench” (an L-shaped tool). Insert it into the faucet body, unscrew the old brass seat, and screw in a new one. This ensures a smooth seal for your new washer.
Conclusion
Learning how to fix a bathtub faucet leak is one of the most rewarding DIY projects you can tackle. For less than $20 in parts and an hour of work, you can silence that annoying drip and lower your water bill. Just remember: plumbing requires patience. Do not overtighten the handles when you are finished—let the new washers do the work gently to ensure your repair lasts for years.