
Tarnished, blackened brass can make even the most beautiful antique hardware or vintage decor look dull and neglected. When faced with years of heavy oxidation, your first instinct might be to reach for a harsh, toxic chemical polish. However, restoring that original golden shine does not require expensive commercial cleaners that fill your home with strong fumes.
Everyday pantry ingredients can do the job perfectly and safely. The secret to chemical-free cleaning isn’t just about the ingredients you use; it is about understanding exactly what type of metal you are dealing with before you start scrubbing. Applying the wrong paste to the wrong piece of hardware can cause irreversible damage.
Here is your complete, step-by-step guide to identifying your brass and cleaning it naturally without toxic chemicals.
Step 1: The Magnet Test (Crucial Before Cleaning)
Before you mix any natural pastes or liquids, you must determine whether the item you are holding is actually solid brass or just brass-plated metal. This single step dictates your entire cleaning strategy.
The Test: Take a standard household magnet (even a fridge magnet will work) and hold it against the surface of the item.
- If the magnet does not stick: You are dealing with solid brass. Brass is an alloy of copper and zinc, neither of which is magnetic. You can proceed with the natural acidic cleaning methods below.
- If the magnet sticks firmly: The item is brass-plated. This means it is made of solid steel or iron (which are highly magnetic) and merely covered with a microscopically thin layer of brass for aesthetic purposes.
The Warning: If your item is brass-plated, you must completely avoid acidic cleaners, abrasive pastes, and heavy scrubbing. Any friction will rapidly strip the thin brass plating right off the steel, ruining the item permanently. Brass-plated items should only ever be cleaned with warm water, a drop of mild dish soap, and a highly soft microfibre cloth.
Step 2: Is the Brass Lacquered or Unlacquered?
If your item passed the magnet test and is indeed solid brass, your next diagnostic step is checking the finish. Manufacturers treat brass in two distinct ways:
- Lacquered Brass: This brass has been sealed with a clear, protective liquid coating at the factory. It generally looks very smooth, glossy, and rarely tarnishes. If it looks dirty, it is usually just surface dust or grease, not actual oxidation.
- Unlacquered Brass: This is raw, uncoated metal. Over time, as the copper in the brass reacts with oxygen and the oils from human hands, it develops a dark, dull, mottled appearance known as a “patina” or tarnish.
How to Clean Lacquered Brass: If your brass is lacquered, put the baking soda and lemons away. You must only use warm soapy water and a soft cloth. Never use natural acids (like lemon juice or vinegar), steel wool, or abrasive baking soda pastes. These will immediately scratch, cloud, and eat through the protective lacquer coating, leaving the brass underneath exposed in ugly, uneven patches. Furthermore, never soak lacquered brass in water, as moisture can seep under microscopic cracks in the lacquer and cause the metal to tarnish from the inside out.
3 Natural Ways to Clean Unlacquered Solid Brass
If you have solid, unlacquered brass that has lost its shine to heavy tarnish, you can easily cut through the oxidation using mild, natural household acids. Here are the three most effective methods.
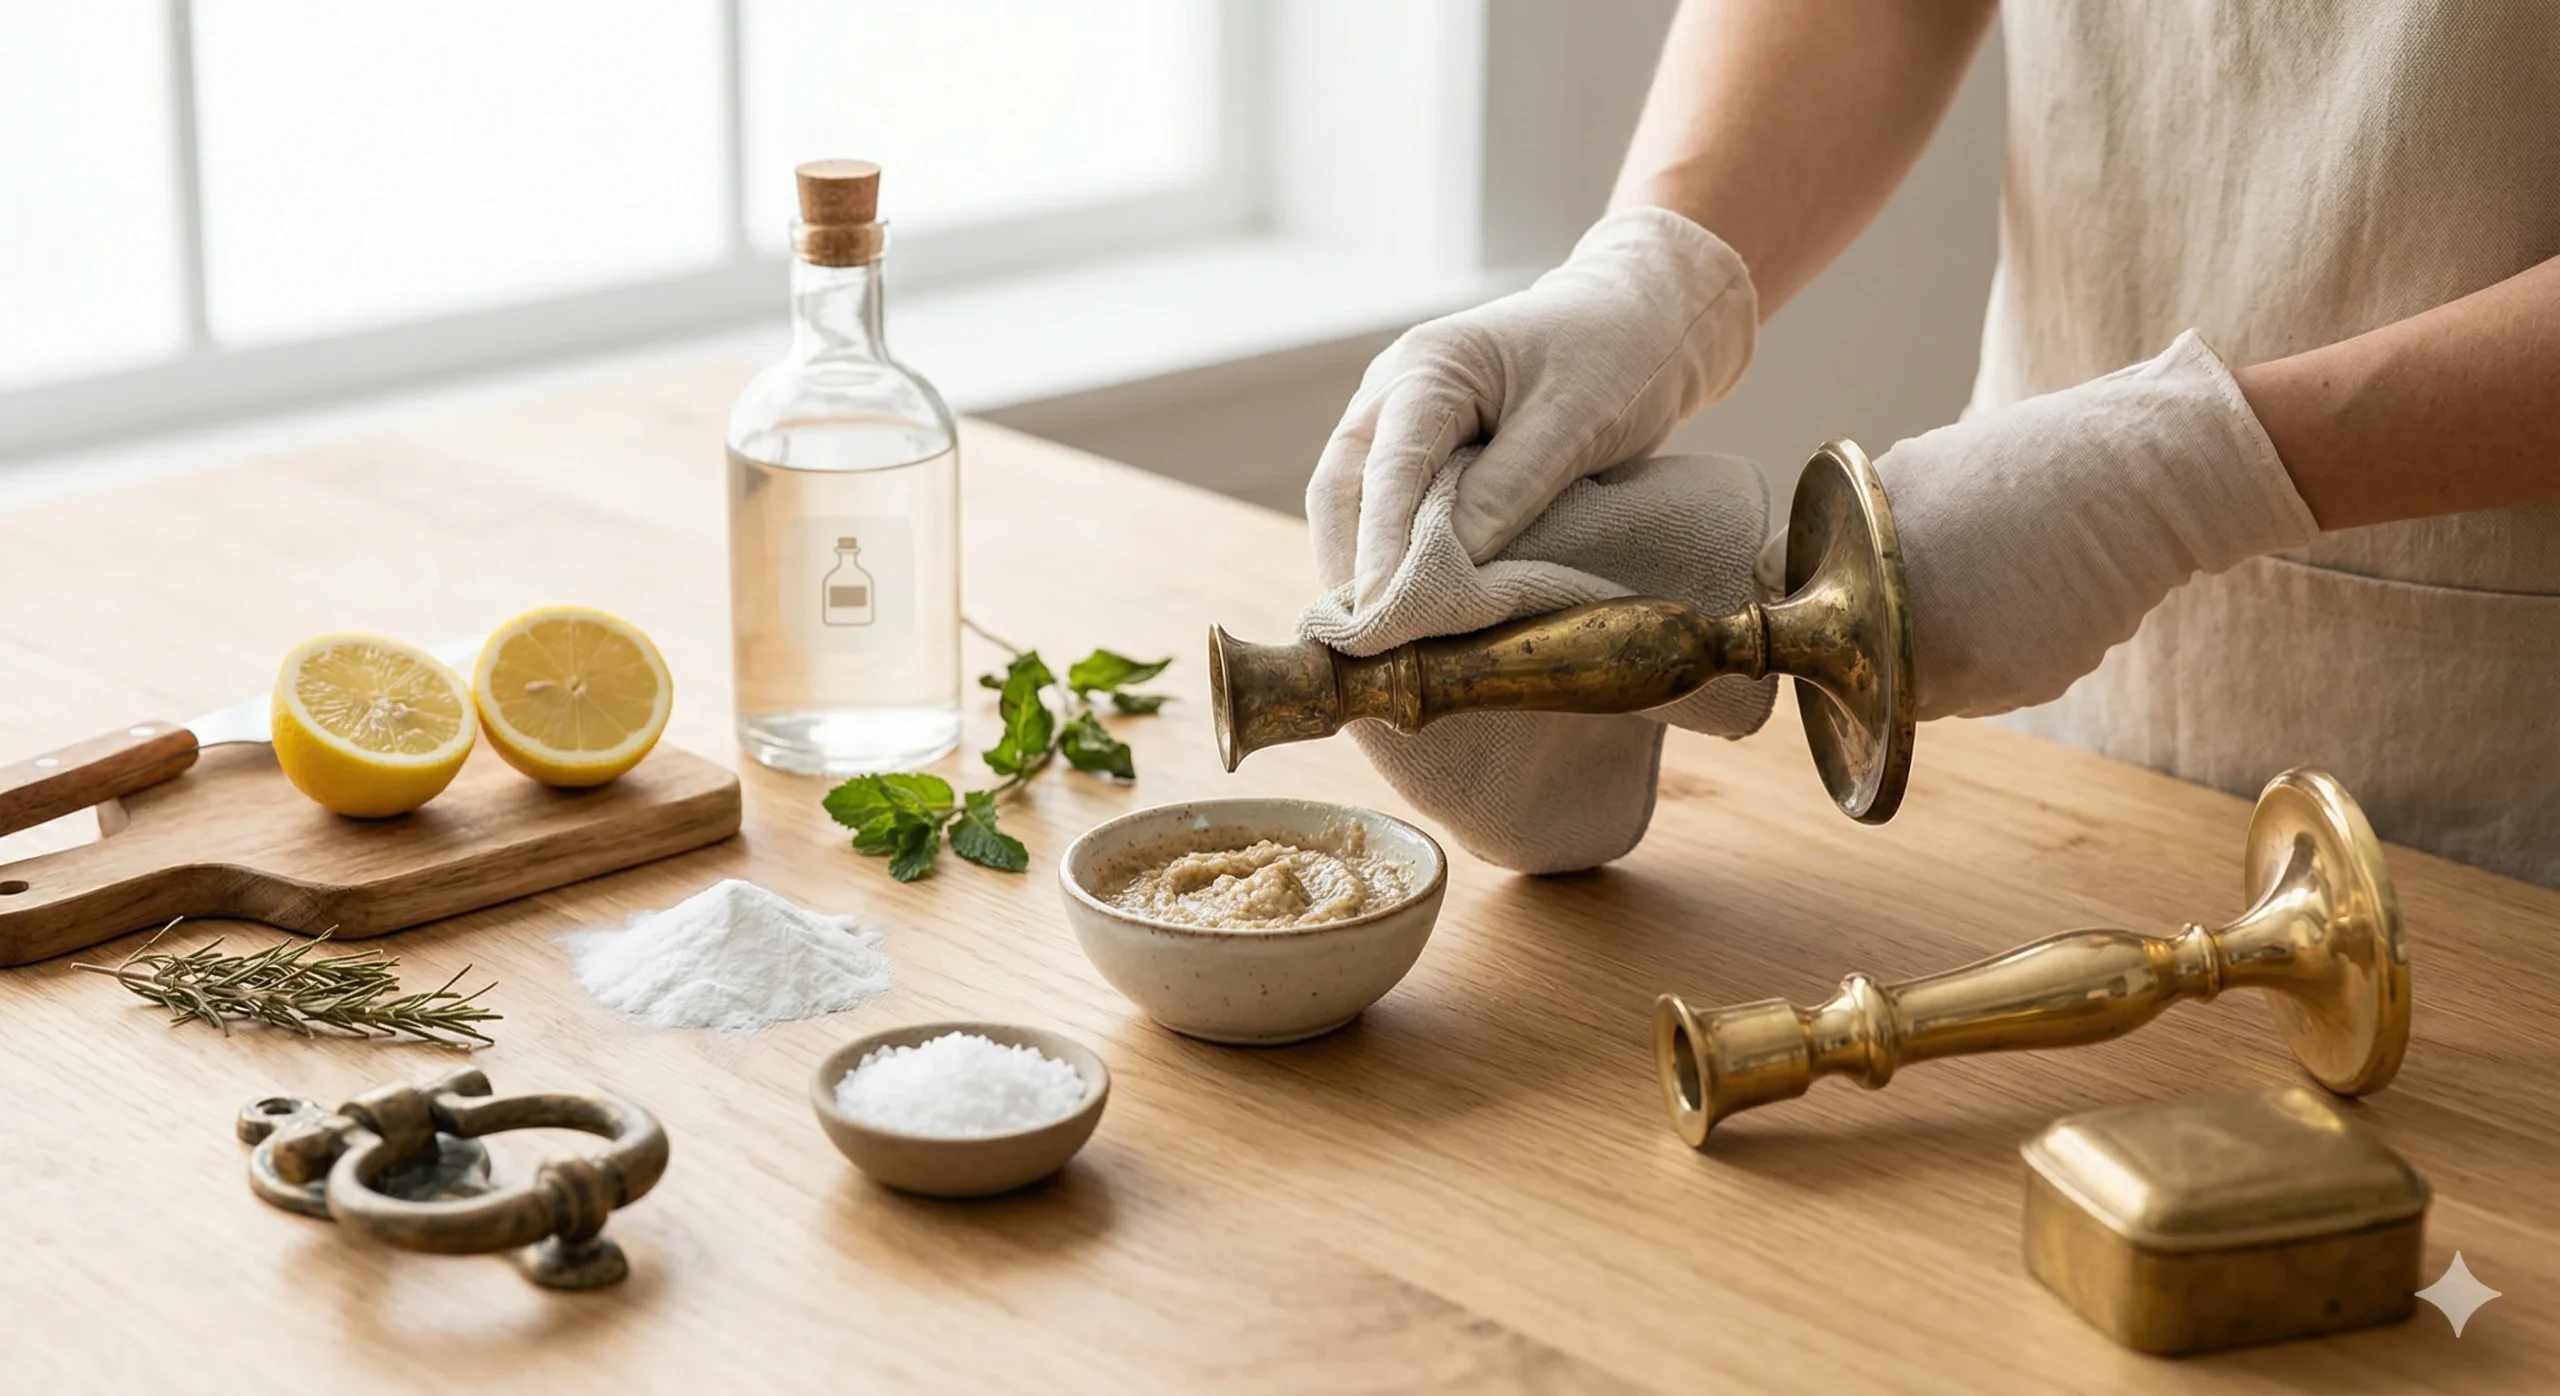
1. The Lemon and Baking Soda Paste (For Fast Results)
This is the most popular natural method because the chemical reaction between the acidic lemon and the alkaline baking soda actively lifts light to medium oxidation from the metal’s surface.
- The Recipe: Squeeze the juice of half a lemon into a small bowl. Gradually stir in just enough baking soda to form a thick, spreadable paste. It will fizz and bubble initially—this is normal.
- The Process: Using a soft cloth or an old, soft-bristled toothbrush, apply the paste generously to the tarnished surface. Gently work it into the crevices.
- The Wait: Leave the paste on the brass for about 10 minutes.
- The Finish: Rinse the brass thoroughly under warm running water to remove all traces of the paste, then buff it completely dry with a clean microfibre cloth.
2. The Vinegar, Salt, and Flour Method (For Heavy Tarnish)
If you are restoring heavily neglected, blackened brass, you need a mixture that will stay wet and cling to the metal for a longer period without drying out.
- The Recipe: In a bowl, combine equal parts standard table salt, white vinegar, and all-purpose flour. Stir until it forms a thick, sticky paste.
- The Process: Spread this paste heavily over the entire brass item. The flour acts as a binder, holding the salt (a mild abrasive) and the vinegar against the tarnish. White vinegar is a powerhouse for tackling heavy oxidation, much like when you use it for how to clean stainless steel appliances without leaving streaks.
- The Wait: Allow the paste to sit undisturbed for at least 30 minutes. The acid needs time to chemically break down the deep oxidation.
- The Finish: Rinse the item thoroughly with warm water, ensuring no paste is left in any decorative grooves, and polish it vigorously with a dry cloth to reveal the shine.
3. The Ketchup Trick (For Everyday Maintenance)
It sounds bizarre, but standard household ketchup is a phenomenal brass cleaner. Tomatoes contain natural citric and ascorbic acids, while the recipe itself contains vinegar and salt.
- The Process: Squirt a thin layer of ketchup directly onto the brass surface.
- The Wait: Let it sit for 15 to 20 minutes. Because ketchup is thick, it won’t drip off rounded hardware like door knobs.
- The Finish: Wash the ketchup off completely with warm soapy water, rinse, and buff the metal dry.
Protecting Your Brass for Long-Term Shine
Once you have successfully stripped away the tarnish and restored the bright golden color of your unlacquered brass, the battle is only half won. The moment raw brass is exposed to the air, the oxidation process begins all over again.
The Solution: To maintain that freshly cleaned shine for as long as possible, you need to manually seal the metal from the oxygen in the room. Apply a microscopically thin coat of natural beeswax, mineral oil, or linseed oil to the brass using a soft cloth. Buff it in well. This creates an invisible, temporary barrier against oxygen, moisture, and the oils from your fingertips, keeping your hardware shining beautifully for months.
FAQs on Cleaning Brass
Why does brass turn green? Those crusty green patches are called verdigris. It is a completely natural chemical reaction that occurs when the copper inside the brass alloy is exposed to moisture, salt, and air over a prolonged period. While a light patina is brown or black, prolonged moisture exposure triggers this green, destructive corrosion. You can scrub it away using the vinegar and salt paste mentioned above.
Can toothpaste clean brass? Yes, plain, solid white toothpaste (not the gel variety) can work in a pinch. Standard white toothpaste contains very mild abrasives designed to polish tooth enamel. Simply apply a dab to the brass, let it sit for five minutes, scrub gently with a soft cloth, and wipe it away with a damp rag for light, surface-level tarnish removal.
Restoring old brass does not require a trip to the hardware store for toxic solvents. It is simply a matter of patience, mild household acidity, and proper drying. Remember, moisture is the enemy of raw brass—always dry your items completely after rinsing to prevent fresh water spots from forming on your newly polished hardware.