


Replacing a flat or low-slope roof is a massive financial undertaking, easily costing $10,000 or more for a standard residential building. But what if you could extend the life of your existing roof by 10 to 20 years for a fraction of that price?
Enter elastomeric roof coating. Often described as “liquid rubber,” this thick, paint-like membrane acts as both a sunscreen and a raincoat for your building. It seals minor cracks, reflects damaging UV rays, and moves with your building to prevent future damage.
This guide explains exactly what is elastomeric roof coating, how to apply it yourself, and whether it is the right solution to stop your ceiling leaks.
What Is Elastomeric Roof Coating?
When homeowners ask, “What is elastomeric roof coating?”, the answer lies in the name: elastic.
Standard exterior paint is rigid. If you paint a rubber roof with standard paint, the paint will crack as soon as the roof expands in the summer heat. Elastomeric coating is different. It is made from high-grade acrylic, silicone, or urethane polymers that cure into a seamless, rubber-like sheet.+2
Key Feature: Thermal Flexibility Roofs undergo “thermal shock”—expanding during the hot day and contracting at night. Elastomeric coatings can stretch up to 300-400% of their original size and snap back without cracking. This elasticity ensures the seal remains intact through freezing winters and scorching summers.+1
Protection from the Top Down By creating a seamless seal at the roof edge, these coatings prevent water from dribbling over the side and rotting the architectural trim below. Understanding components like what is a frieze board helps explain why keeping the roof edge sealed is critical; if the coating fails at the edge, water runs behind the siding and rots these decorative boards.
Will Elastomeric Roof Coating Stop Leaks?
This is the most common question: “Will elastomeric roof coating stop leaks?”.
The answer is yes, but with conditions.
- Micro-Cracks: Yes. The coating is thick (applied 5-10 times thicker than paint) and will fill pinholes, hairline cracks, and dried-out pores in bitumen or concrete.
- Large Tears: No. If you have a visible tear, a hole, or a seam that has lifted, the liquid coating will just fall through the hole. You must patch these areas with roofing mesh and heavy mastic before applying the coating.
The “Cool Roof” Bonus Most elastomeric products are white roof coating. By turning a black asphalt roof white, you reflect up to 85% of the sun’s UV rays. This can drop your roof surface temperature by 50°F or more, significantly lowering your air conditioning bills.
Types of Coatings: Acrylic vs. Silicone
Not all “liquid rubber” is the same. You need to choose the right chemistry for your roof.
1. Acrylic Elastomeric Coatings
- Best For: Sloped roofs and dry climates.
- Pros: Water-based (easy cleanup), affordable, and breathable (lets trapped moisture escape). Brands like Henry elastomeric roof coating are popular acrylic options found in hardware stores.
- Cons: It breaks down if water sits on it. Do not use acrylic on flat roofs with “ponding water” (puddles that stay for 48+ hours).
2. Silicone Elastomeric Coatings
- Best For: Flat roofs with ponding water.
- Pros: Completely waterproof. Water can sit on it indefinitely without breaking it down.
- Cons: More expensive and slippery when wet.
Cost Comparison Before buying, compare the numbers. A full roof replacement cost might run $8–$12 per square foot. Coating typically costs $1.50–$3.00 per square foot. If the roof structure is sound, coating is the obvious financial winner.
How to Apply Elastomeric Roof Coating (Step-by-Step)
Searching for “how to apply elastomeric roof coating” reveals that preparation is 90% of the job. If the roof is dirty, the coating will peel off like a sunburn.
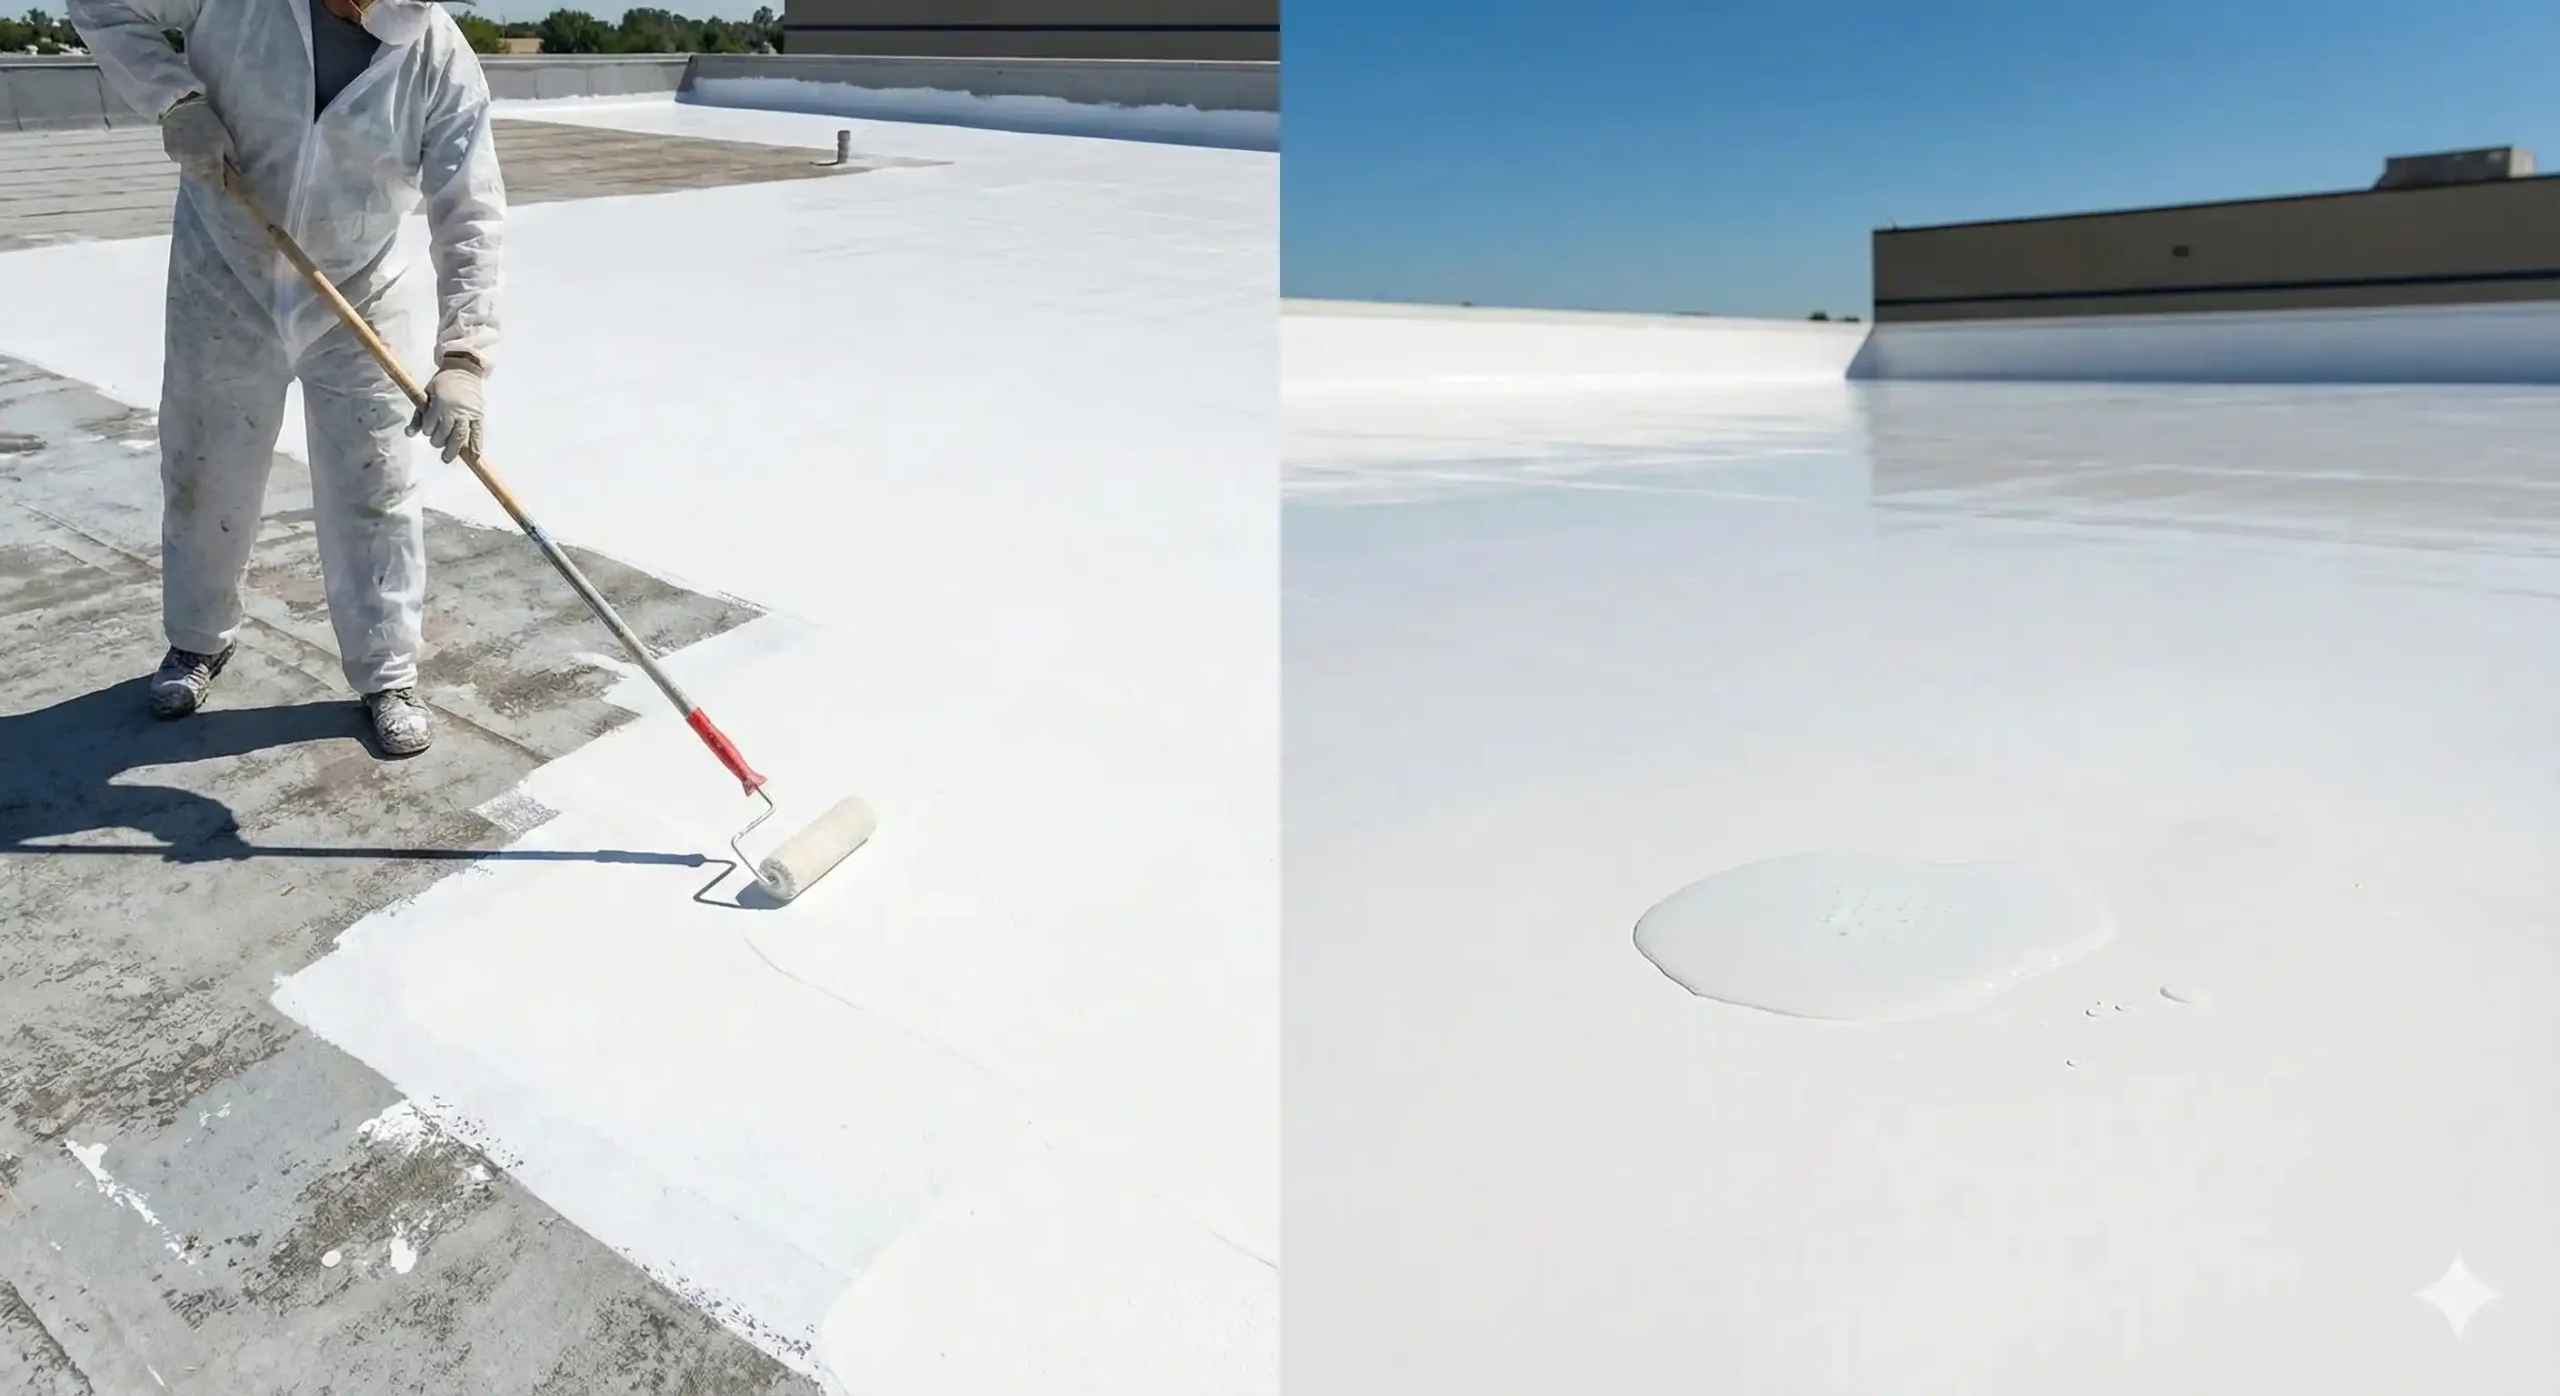
Step 1: The Deep Clean You must pressure wash the roof to remove moss, dirt, and loose granules. Use a biodegradable roof cleaner. Let the roof dry completely (this may take 24-48 hours).
Step 2: Repair (The “Three-Course” Method) Identify cracks, blisters, and seams.
- Apply a layer of roof cement (mastic).
- Embed a strip of reinforcing polyester fabric.
- Apply another layer of mastic over the fabric. Allow these repairs to cure before coating the whole roof.
Step 3: Prime (If Needed) If you are coating an old asphalt or bitumen roof, you often need a “bleed-blocking” primer. Without it, the oils from the asphalt will bleed through the white coating, turning it yellow and brittle.
Step 4: The Application
- Tools: Use a thick-nap roller (3/4″ to 1″) or an airless sprayer.
- Coat 1: Apply the first coat somewhat liberally. Let it cure (usually 24 hours).
- Coat 2: Apply the second coat perpendicular to the first. If you rolled North-South yesterday, roll East-West today. This “cross-hatching” ensures no pinholes are missed.
Conclusion
Elastomeric roof coating is one of the most effective DIY maintenance projects for commercial and residential flat roofs. It stops leaks, lowers energy bills, and makes your roof look brand new. However, it is not a magic wand for a rotten roof. If your deck is spongy or the insulation is saturated, you need a replacement, not a bucket of paint.
Final Tip: Check the weather forecast. You need a window of at least 24 hours (preferably 48) of dry weather with temperatures above 50°F (10°C) for the coating to cure properly. Don’t let a rainstorm wash your hard work down the drain.