

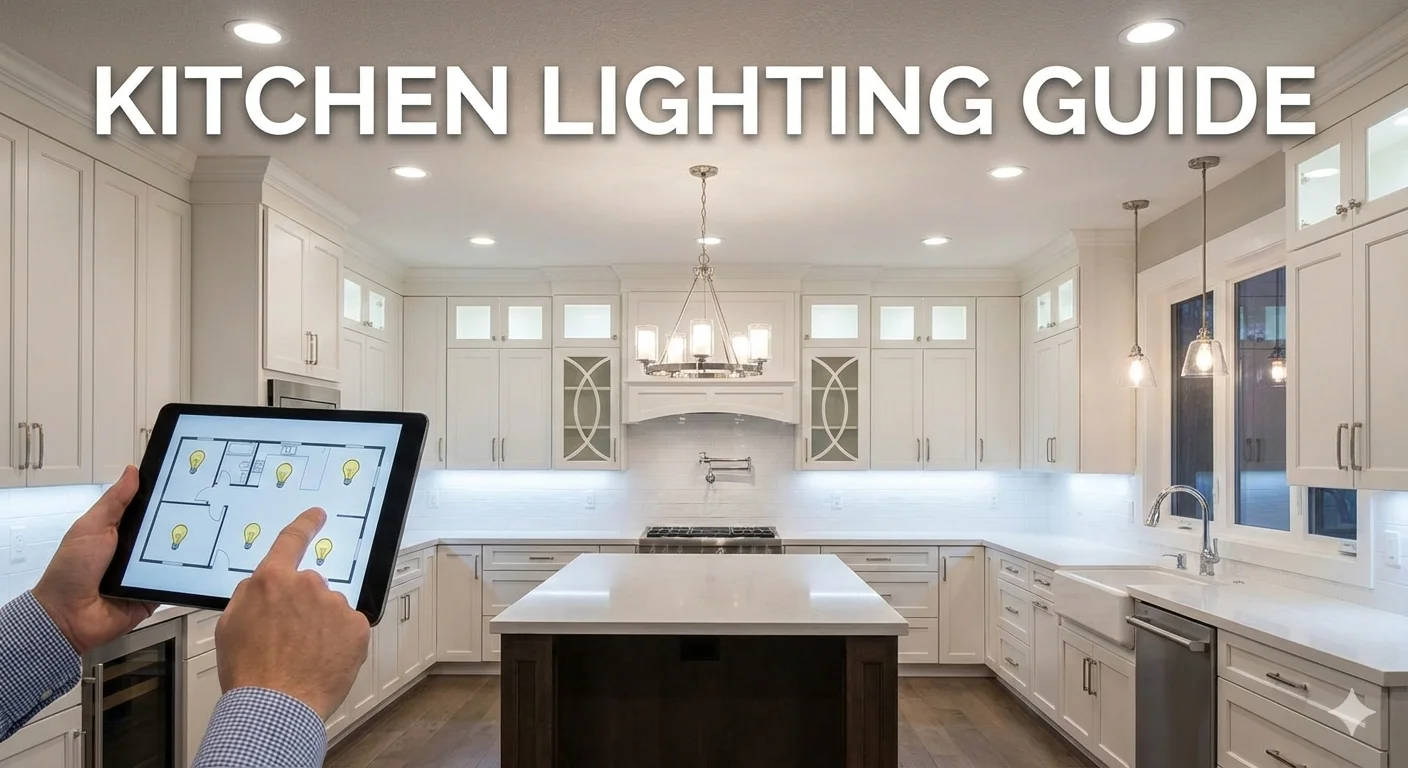
A beautiful kitchen renovation is wasted if you can’t see the vegetables you are chopping or the company you are entertaining. While cabinetry and countertops often get the glory, kitchen lighting is the unsung hero of interior design. It defines the mood, ensures safety, and can make a small space feel expansive.
However, lighting a kitchen is more complex than screwing in a single bulb. You need to balance functionality with aesthetics, navigating a mix of kitchen light fixtures ranging from recessed cans to statement pendants.1 This comprehensive guide covers the three essential layers of light, optimal placement rules, and how to select the perfect fixtures for your home.
The 3 Layers of Kitchen Lighting
Designers never rely on one light source. To create a space that is both usable and welcoming, you must layer three distinct types of light.
| Lighting Layer | Purpose | Best Fixtures |
| 1. Ambient (General) | The “Base” layer. Provides overall visibility for cleaning and walking. | Can lights in kitchen, flush mounts, track lighting. |
| 2. Task (Work) | Focused light for safety. Eliminates shadows in work zones. | Under cabinet light strips, over kitchen sink lighting. |
| 3. Accent (Mood) | Decorative. Highlights architectural features or creates a “night light” glow. | Toe-kick lights, glass cabinet puck lights, picture lights. |
Kitchen Island Lighting: Pendants & Chandeliers
The island is often the centerpiece of the modern home, and kitchen island lighting acts as its jewelry. This is where you can trade pure utility for style.
The “Rule of Three”
A common question is how many pendants to hang.
- Use 3 Pendants: If your island is large (over 7 feet), three medium-sized pendants create a balanced, symmetrical look.
- Use 2 Pendants: If the island is smaller, or if you are using massive, oversized statement fixtures, two lights are often better to avoid visual clutter.
Height & Placement
Standard design rules state that kitchen pendant lighting should hang 30 to 36 inches above the countertop.2 This places the light close enough to illuminate the surface but high enough so it doesn’t block your view across the room.
- Pro Tip: If you have vaulted or cathedral ceilings, standard cords might not hang straight. You should check different types of ceilings in your home to determine if you need fixtures with “slope adapters” or rigid rods to keep the lights vertical and stable.
Mastering Can Light Placement in Kitchen
Recessed lighting (often called “can lights”) provides the heavy lifting for your ambient layer.3 However, can light placement in kitchen ceilings is where most DIYers make mistakes.
The “Shadow” Mistake
Do not place can lights in the center of your walkways. If the light is behind you while you stand at the counter, your body blocks the light, casting a shadow right where you are working with a knife.
- The Fix: Position recessed lights directly over the edge of the countertops. This ensures the beam hits your hands, not your back.
Spacing Guidelines
For general can lights in kitchen layouts, space the lights 4 to 6 feet apart. The goal is to have their light beams overlap slightly so there are no dark spots on the floor.
Task Lighting: Under-Cabinet & Over-Sink
Once the overhead lights are set, you need to focus on the work zones.
Under Cabinet Light Options
The upper cabinets often block overhead ceiling lights, leaving your counters dark.4 Installing under cabinet light strips is the solution.
- LED Tape Light: Thin, invisible, and provides uniform light across the entire counter.
- Puck Lights: create pools of focused light (drama) but can leave dark spots in between.5
Over Kitchen Sink Lighting
The sink is the most used area in the kitchen. A dedicated light here—whether a recessed can or a small pendant—is non-negotiable for dishwashing visibility.
- Renovation Note: If you are planning hardwired lighting, the wiring must be run before the backsplash is tiled. When you are learning how to install kitchen cabinets, that is the exact moment to drill the feed holes and run low-voltage wire for your under-cabinet system to ensure a seamless, wire-free look.
Technical Specs: Lumens & Kelvins
Buying the fixture is only half the battle; you also need the right bulb.
Color Temperature (Kelvins)
- 2700K (Warm White): Too yellow for kitchens. Best for bedrooms.
- 3000K (Soft White): The standard choice. Warm but clean.
- 4000K (Cool White): Very bright and “daylight” crisp. excellent for prep zones but can feel a bit clinical for a dinner party.
Brightness (Lumens)
A typical kitchen needs roughly 30-40 foot-candles of light. In plain English, for a standard 150 sq ft kitchen, you need about 4,000 to 5,000 lumens total spread across all your fixtures.
Conclusion
Great kitchen lighting is a marriage of science and art. By laying a grid of practical recessed cans, adding focused task lighting under cabinets, and finishing with statement pendants over the island, you create a room that is functional for cooking and beautiful for gathering. Before you buy a single fixture, draw a “lighting map” of your ceiling to ensure every corner of your kitchen is brought out of the dark.