


Introduction
If you’re renovating your kitchen, learning how to install kitchen cabinets yourself can save thousands and give you total creative control over the final look. While it requires careful planning, patience, and precision, it’s absolutely achievable for any determined DIYer.
In this guide, we’ll walk through every step — from measuring and marking to mounting and finishing — so you can confidently transform your kitchen into a professional-looking space. Whether you’re upgrading your old cabinets or starting fresh, this detailed breakdown will ensure your installation is smooth, level, and lasting.
1. Gather Your Tools and Materials
Before you lift a single cabinet, preparation is key. Here’s what you’ll need to get started:
Tools:
- Tape measure
- Level (preferably a 4-foot one)
- Power drill and bits
- Stud finder
- Clamps
- Shims
- Screwdriver set
- Pencil or chalk line
- Safety gear (gloves, goggles)
Materials:
- Cabinets (base and wall)
- Cabinet screws (2½–3 inches)
- Filler strips and trim
- Caulk and wood putty
- Hardware (handles, knobs, hinges)
Double-check your measurements and inspect your walls and floors for uneven spots — small imperfections can cause major alignment issues later.
2. Step 1: Measure and Mark Your Layout
Precision begins with accurate measurement. Use a pencil or chalk line to mark the cabinet layout directly on your walls.
Pro Tip:
- Mark the top of the base cabinets (usually 34½ inches from the floor).
- Draw a second line for the bottom of the wall cabinets (typically 18 inches above the base).
- Outline each cabinet’s width and height to visualize the full layout.
This step ensures everything aligns perfectly before drilling begins.
3. Step 2: Locate and Mark Wall Studs
Use a stud finder to identify where your wall studs are — these will anchor the cabinets securely. Mark each stud with a vertical line across your layout marks.
It’s crucial to attach cabinets directly into studs; drywall alone won’t support their weight once loaded with dishes or appliances.
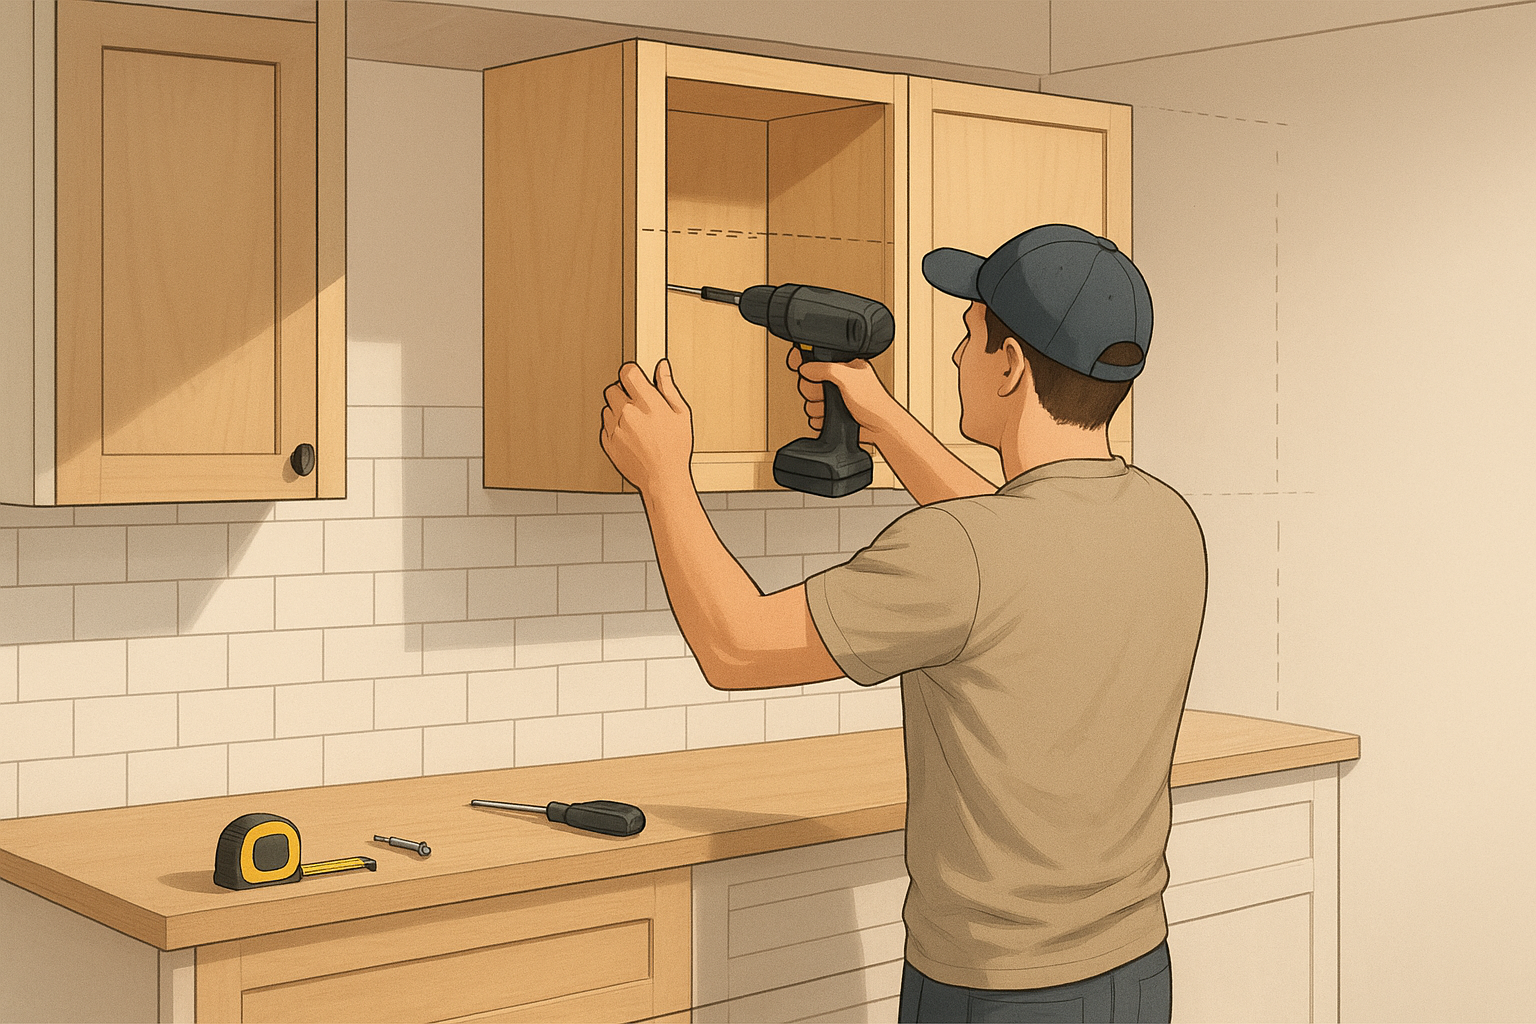
4. Step 3: Start with the Wall Cabinets
Always install wall cabinets first — it’s much easier when you don’t have to lean over base units.
Here’s how:
- Screw a temporary ledger board beneath your wall cabinet line to hold the weight.
- Begin with the corner cabinet — it sets the alignment for everything else.
- Drill pilot holes through the cabinet’s back rail at each stud mark.
- Lift the cabinet onto the ledger, level it, and screw it in place.
- Continue with the adjacent cabinets, clamping and screwing them together at the sides.
Once all wall units are secure and level, remove the ledger board.
5. Step 4: Install the Base Cabinets
Now that the wall cabinets are secure, it’s time for the base units.
Steps:
- Start in a corner and place your first base cabinet.
- Use shims to adjust for any uneven flooring.
- Once level, screw the cabinet to the wall studs.
- Continue along the wall, connecting each cabinet side-by-side with clamps and screws.
- Check alignment as you go — small gaps can make countertops uneven later.
Bonus Tip: Use a long level to check both horizontal and vertical lines every few steps.
6. Step 5: Add Finishing Touches
After all cabinets are installed and leveled, it’s time to bring everything together.
- Add filler strips where necessary to close gaps.
- Reinstall doors and adjust hinges for smooth operation.
- Apply caulk or trim around edges for a professional finish.
- Install handles, knobs, and drawer pulls.
If your cabinets require painting or refinishing, you can learn how in our related guide — How to Paint Kitchen Cabinets.
7. Common Mistakes to Avoid
Even experienced DIYers can trip up during cabinet installation. Here’s what to watch for:
- Skipping measurements: Even a ¼-inch mistake can cause misalignment.
- Not checking for level: Unlevel cabinets can affect countertops and doors.
- Forgetting to pre-drill holes: Can cause wood splitting or crooked screws.
- Installing base units first: Makes reaching wall cabinets harder and riskier.
Take your time — rushing this process can lead to expensive corrections.
8. Professional vs DIY Installation
If you’re on the fence about whether to do it yourself, consider the pros and cons:
DIY Installation Pros:
- Saves money on labor.
- Custom control over layout and timing.
- Great skill-building experience.
Cons:
- Time-consuming.
- Requires precision and patience.
- May need extra tools or helpers for lifting.
For those looking to balance budget and quality, Home Depot’s Kitchen Installation Guide and HGTV’s remodeling tips offer great visuals and cost estimates for comparison.
9. Long-Term Care and Maintenance
Once your kitchen cabinets are in place, proper maintenance keeps them looking new:
- Wipe spills immediately to prevent staining or swelling.
- Tighten hardware regularly.
- Clean using mild soap — avoid harsh chemicals that can damage finishes.
- Re-seal or repaint when signs of wear appear.
You can also read our related guide on How to Unclog a Kitchen Sink to keep your kitchen running smoothly from top to bottom.
Conclusion
Learning how to install kitchen cabinets isn’t just about attaching boxes to walls — it’s about transforming your space with craftsmanship and confidence. With careful preparation, accurate measurements, and a steady approach, anyone can achieve a professional-grade finish.
Take your time, follow each step, and soon you’ll have a kitchen that’s not only functional but beautifully designed by you.